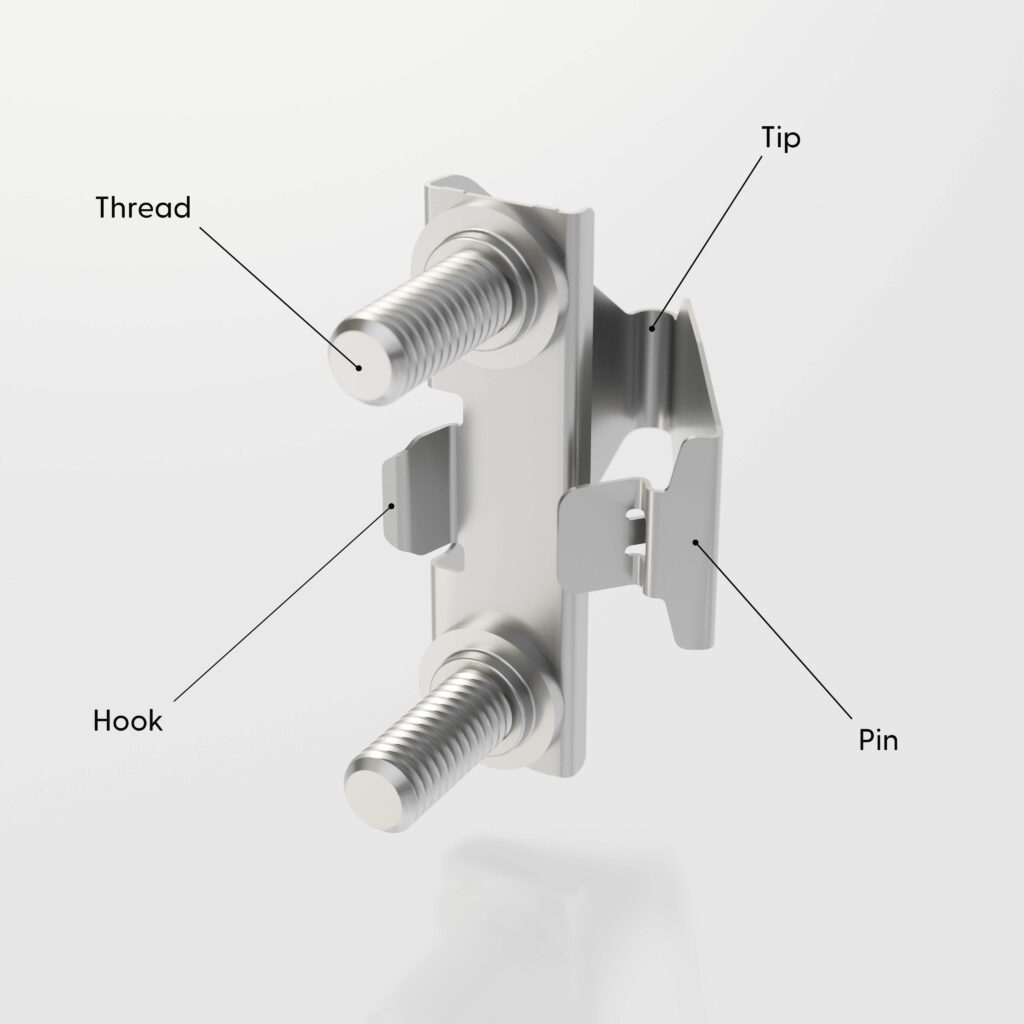
Schritt 1:
Richten Sie die /dev/mount mit den Gewinden zu Ihnen hin an der 19"-Schiene aus. Führen Sie die /dev/mount von hinten in die Schiene ein. Die Gewinde sollten mit dem oberen und unteren Loch der Rackeinheit übereinstimmen, wobei der Haken durch das mittlere Loch geht. Der Haken muss in der Schiene einrasten.
Schritt 2:
Achten Sie darauf, dass Sie die /dev/mount gerade halten. Drücken Sie die Spitze leicht zu sich hin und drücken Sie dabei mit dem Daumen das vordere Ende des Clips von der Seite in Richtung der 19"-Schiene, bis er einrastet.
Schritt 3:
Nehmen Sie die Sechskantmuttern und ziehen Sie sie mit der Hand fest. Nur mit der Hand. Verwenden Sie keine Werkzeuge zum Anziehen der Sechskantmuttern! Maximales Drehmoment von 3 Nm - mehr kann Ihre 19"-Schiene und/oder Ihre Ausrüstung verformen.
Schritt 4:
Um die /dev/mount zu demontieren, drücken Sie die Spitze von hinten zu sich hin und dann leicht nach innen in den Netzwerkschrank. Der eingeschnappte Clip sollte sich lösen.
Schritt 5:
Entfernen Sie das nun lose /dev/mount von hinten und nehmen Sie es aus der 19"-Schiene heraus.