Editing the ID-Label Template
Step 1:
Open the editable Template PDF with a PDF Reader. We recommend using Adobe Acrobat Reader for the best experience, but it the PDF also compatible with Preview, Google PDF Viewer, Foxit Reader, and many others. The provided ZIP file includes two options: a one-line ID-Label template and a two-line ID-Label template. Choose the version that best fits your needs.
Step 2:
Click to populate cells inside the .pdf and and write your documentation. Use the “Notes” field to add information about the rack/ room you’re documenting. We recommend labelling and identifying cables according to the TIA-606-C standard.
Printing the patchbox.one ID-Labels
Step 1:
Open your printer tray and remove all paper sheets. Place the ID Label A4 paper in your tray and close it. Beware! Different printers may use different orientation settings, we recommend performing a test print to determine the correct tray orientation.
Step 2:
Modify your printer setting accordingly: “Portrait”, change the page size to A4, and “Scale: 100%”.
Step 3:
Take the printed ID Label paper and peel out the labels to add them to the patchbox.one / Brake. (edited)
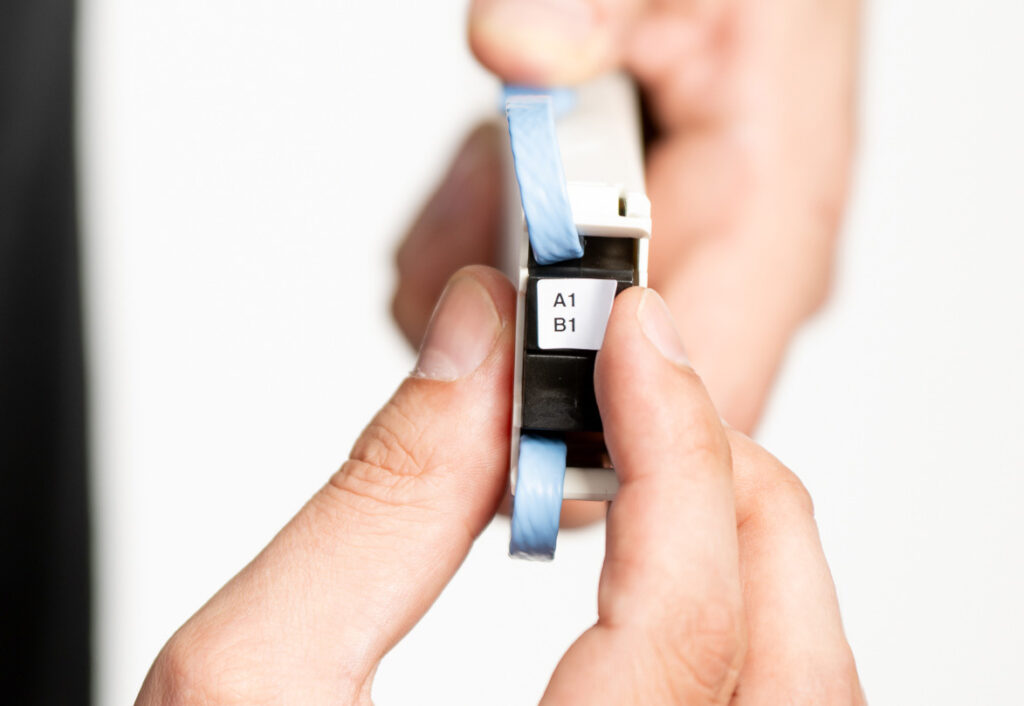
Placing them on the patchbox.one / Brake
Step 1:
After you successfully edited and printed your patchbox.one / ID-Labels, it’s time to add them to your Cassette. Peel the sticker ID-Label out of the sheet of paper.
Step 2:
We recommend users to label the Cassettes before they finish patching the rack. Look closely at the brake on the front of your Cassettes and place the label over the surface area. Push firmly to let the adhesive bond onto the brake surface area.
Step 3:
To remove, simply peel off the label from the brake.